 Preferred Store:
 My Account Sign-In


Sign-up for {N}power to get exclusive discounts, newsletters, members-only features, and more!
August 2025 Health Hotline® Magazine Issue 97

Recipes
- Ice Cream Cake
- Grain-Free Stone Fruit Galette
Articles
- A Brain on Fire - How Inflammation Plays a Role in Anxiety & Depression
- Natural Constipation Relief that Works
- For The Love of Organics: Stone Fruits
- Earth Watch
Articles
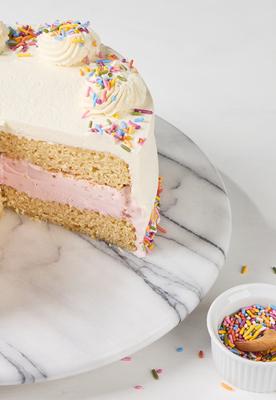
Ice Cream Cake
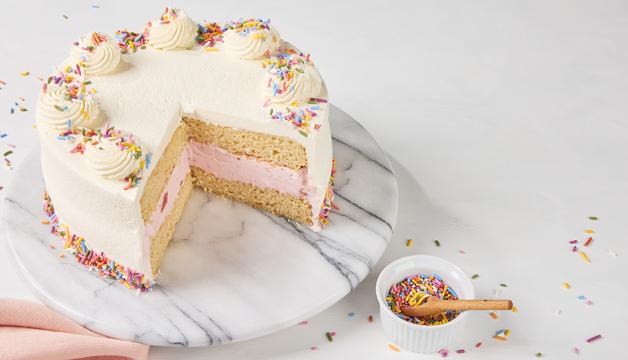
What’s better than cake and ice cream? Ice cream cake! And the sky’s the limit with this make-ahead celebratory treat. Create your perfect custom cake by starting with our Natural Grocers® Brand Gluten-Free Vanilla Cake Mix, choose your favorite ice cream flavor, and get creative with your toppings. How about chocolate ice cream with crumbled gluten-free cookies on top? Or strawberry ice cream with slivered almonds and crumbled graham cracker topping or maybe all vanilla with naturally colored sprinkles and natural dye for a unicorn of a cake? Don’t let the time intimidate you—this cake is easy to put together and most of the time is hands-off!
For the cake
1 box Natural Grocers Brand Gluten-Free Vanilla Cake Mix
3⁄4
cup
(1 ½ sticks) organic unsalted butter, softened
2
tablespoons
Natural Grocers Brand Organic Extra Virgin Olive Oil
1
cup
organic milk
3
Natural Grocers Brand Regenerative Organic Certified® Pasture-Raised Eggs
1
teaspoon
organic vanilla extract
For the ice cream filling and topping
2
pints
organic ice cream of your choice
2
cups
organic heavy whipping cream
1/3 - 1/2 cup organic powdered sugar
1 1⁄2
teaspoons
organic vanilla extract
Optional add-ins and topping ideas
Natural Grocers Brand Bulk sliced or chopped nuts and/or Organic Fair Trade Semi-Sweet Mini Chocolate Chips
Crushed gluten-free graham crackers or crushed gluten-free cookies
Naturally colored sprinkles and/or natural food coloring
- Prepare the cake according to the box directions, adding natural food color to one or both cakes if desired. Bake in two 8- or 9-inch round pans.
- While the cakes bake, prepare a spot in your freezer to hold the completed cake.
- When the cakes are baked, let them cool in the pans for 10 minutes, then transfer them to a cooling rack. Take the pints of ice cream out of the freezer.
- Wipe one of the cake pans clean and allow it to cool completely before cutting a round piece of parchment to fit the bottom of the pan and two pieces of parchment ½-inch thick by 13-inches long. Once the pan is cool, lay the two long strips in an X and then place the round parchment over them. Alternatively, line the baking pan with plastic wrap that overhangs the sides by a couple inches.
- When the ice cream has softened, put both pints in a large bowl and use a large spoon to mash it until it is uniformly soft and spreadable (it should not be runny). If using vanilla, add natural food coloring and/or sprinkles now if desired. Spread the ice cream into the prepared pan, making sure to spread it all the way to the edges. Transfer the ice cream to the freezer for at least one hour. Put the bowl and the beater you will use to whip the cream later in the freezer too.
- Just before you are ready to put the cake together, whip the heavy cream with a handheld or stand mixer in the chilled bowl until soft peaks begin to form. Add the powdered sugar, to taste, and the vanilla extract and whip until stiff peaks form. You can also add natural food coloring to some or all of the whipped cream if desired. Transfer to the refrigerator.
- Place one of the cake rounds on a serving plate large enough to hold the cake. Remove the pan with the ice cream from the freezer and run a thin spatula around the edge to loosen it. Use the overhanging parchment to pull the ice cream up and out of the pan. Carefully flip the frozen ice cream onto your hand then gently place it on top of the cake. Place the remaining cake on top of the ice cream and straighten it if necessary. Frost the cake with the whipped cream—you’ll need to work quickly to prevent the cake from melting. If at any point your cake seems to be softening, transfer the whole thing to the freezer for 20 minutes before proceeding. Use any leftover whipped cream to pipe decorations on top or dollop on top of slices just before serving. Sprinkle optional toppings over the top and freeze for at least 30 minutes before serving.
- To serve, use a sharp chef’s knife to cut pieces and serve immediately. If the cake feels too hard to cut, allow it to sit at room temperature for a few minutes to soften slightly. Store any leftovers tightly wrapped in the freezer for up to one month.
Dairy-free version:
For the cake, replace the butter with Natural Grocers Brand Organic Extra Virgin Coconut Oil and omit the olive oil. Use unsweetened dairy-free milk in place of the milk. Choose your favorite dairy-free ice cream and replace the heavy whipping cream, powdered sugar, and 1½ teaspoons vanilla with two (9-ounce) tubs of coconut whipped topping. You will need to transfer the topping to the refrigerator about 2-4 hours before you are ready to put the cake together.
See Less
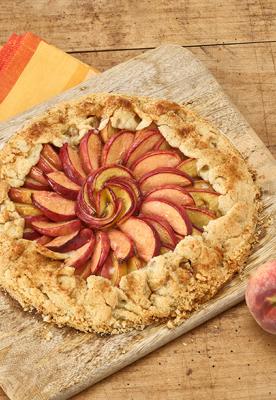
Grain-Free Stone Fruit Galette
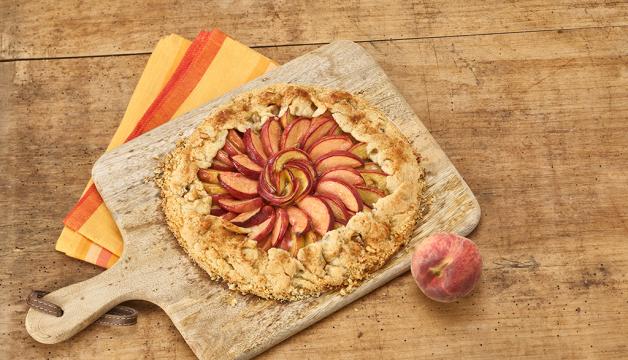
Think of a galette as pie’s laid-back, rustic French cousin. They are easy to make, make a stunning presentation, and are every bit as delicious as a pie. This good4u™ version is gluten free, grain free, and refined sugar free. Highlight summer’s sun-kissed stone fruit with this mouthwatering galette.
1 1⁄2
cups
Natural Grocers® Brand Bulk Almond Flour
1⁄2
cup
tapioca flour
1⁄4
teaspoon
Natural Grocers Brand Bulk Real Salt
6
tablespoons
very cold organic butter, cut into ½-inch cubes
1-3 tablespoons ice water
3 1⁄2
cups
of any combination of ripe but firm organic peaches, plums, or nectarines (about 1 1/4 pounds of whole fruit total)
1
tablespoon
organic lemon juice
1 1⁄2
tablespoons
tapioca flour
1/2 - 3/4 cup Natural Grocers Brand Bulk Organic Coconut Sugar
Organic vanilla ice cream, optional for serving
- Add ice to a ¼ cup of water. Pulse almond flour, tapioca, and salt in a food processor, then scatter the butter pieces over the dry ingredients. Pulse three to four times. Add 1½ tablespoons of ice water and pulse twice. Check the dough: Press some of the dough between your fingers, it should hold together easily; if it doesn’t, add more water, one teaspoon at a time, while pulsing briefly until it does. Be careful not to overmix; the butter should remain in visible pea-sized chunks and the dough should just hold together when pinched.
- Gather the dough into a ball. The dough will be a little crumbly but should come together when you squeeze it into a ball. Cover with plastic wrap or a beeswax wrap, and place in the refrigerator. Chill for at least one hour and up to three days.
- When the crust has chilled for at least an hour, preheat the oven to 400° F.
- Roll the dough out between two pieces of parchment paper to 1/8-inch thick and about 12 to 14-inches wide. Transfer the dough, still on the bottom piece of parchment, to a rimmed baking sheet. Transfer the baking sheet and dough to the refrigerator.
- Pit the fruit and cut into ¼ - ½-inch thick slices. Place in a medium bowl and gently toss the sliced fruit with the lemon juice, tapioca, and coconut sugar. Use ½ cup of coconut sugar if your fruit is very ripe and/or you prefer a lightly sweetened galette, use ¾ cup for less ripe fruit and/or a sweeter galette.
- Mound the fruit in the center of the dough, leaving a two-inch border around the edge. The dough is delicate so use the parchment to carefully lift up 2-3-inch sections of the dough and fold the edges over the fruit, pleating the dough to overlap each fold over the last, leaving the center exposed. Use your fingers to gently mend any cracks or breaks in the dough so the juices stay in while baking.
- Bake for 35-45 minutes, or until the crust is golden brown and fruit is bubbly. Let cool for 10-15 minutes before serving with a scoop of vanilla ice cream if desired. The galette is best served warm or within a few hours of baking, although leftovers will keep for up to 48 hours covered and refrigerated.